Showing posts with label i3330. Show all posts

Tuesday, 18 February 2014

Havok Collisions


 Initial Implementation

           When we found out that we had to use The Havok Physics Engine for collisions, we heard that we had to use the abstract class: hkpContactListener. From here we fiddled around with it in the Havok Sdk, until we had the bare bones of what we needed.  For this to work we needed to initialize the contact listener first, by giving it 2 rigid bodies which it must search for a collision between, this would be an issue I’ll explain later. Once that is done, the contact listener must be attached to one of the 2 rigid bodies in the initialize function.
           How Havok handles it after that I do not know, however there is one function I can call to check if the 2 rigid bodies have collided. This function is the contactPointCallBack function, which is a virtual function so we can redefine it. This way in our game we have it so that we can set what the function does, which in our case sets a Boolean value for hit to be true.


 Issue 

The issue with this is that the only one object will know if it has collided with the other. For example if the listener was attached to the bullet, and the bullet collided with the enemy, only the bullet would know that it had collided with the enemy. The initial response I had was that I should just add another listener for the Enemy for that bullet, but that would not have been preferred.
    Figure L5
Looking at my initial thought diagram (figure L5); this would be one heck of a tangled messed if I did it that way. First, every enemy would have to check every bullet and the same vice versa. This is highly problematic because we wanted to have special attributes per bullet, so the bullet and enemy would have to communicate at some point. Another issue is that the when a new bullet is added, existing enemies will have to add another listener for that bullet. Finally when the enemies/bullets despawn, how do I know which ones to stop checking for in the opposite class?
 

 Solution

           Thinking about these problems, I though the only solution is some form of reference to the object it was searching for! To do this I initially had to decide which object will be referred to and which objected will have the listener.  The answer was simple; the bullet would have the listener, while enemies will be referred to. This is because no new enemies will spawn within the lifespan of the bullet (3 seconds or hitting another object), unless its end of a round.  
           Doing this meant I had to modify the listener class to take in a pointer to the enemy. This would modify the bullet manager to take in the enemy vector, so that I can get the pointers of all the enemies in the scene. Once that was done I had an array of bullet listeners, one for each enemy, each initialized in their own function (figure L6). The bullet will have to check the listener if it got hit, using a Boolean. With this when there is a collision, we can now have the pointer to the enemy call its hit response function, allow for more logical and easier to read code! Figure 6

Thursday, 21 November 2013

Insomnaic Games Engine, Resistance 2 and its A.I.


Insomniac Games

Insomniac Games is game development company well known for their PlayStation franchises, such as Spyro, Ratchet and Clank, and Resistance. My first Insomniac game was Ratchet and Clank: Up Your Arsenal, in fact I wrote this blog while listening the R&C: UYA OST :P. However another Insomniac game I loved was Resistance 2, for its ambitions and scale which it achieved!

The information on this blog comes from the talk on Navigation in Insomniac Engine at GDC 2011, found here. Reddy Sambavaram speaks about the evolution of the AI Navigation from the ps2 to ps3, and in several of Insomniac's games including Resistance: Fall of Man and Resistance 2, Ratchet and Clank Future series, etc. This blog will mainly go over the sections leading to the end of Resistance 2’s AI development and methods of navigation within their games.

A.I. in General

Well-designed/created A.I. is needed for the player to properly have a challenge from non-controlled opponents. They must be created in a way navigate similar to the player, to give them a worthy opponent. At the same time these opponents must not be abuse able, where they'll be found in a strange situation. Remember A.I. stands for artificial intelligence, so as much as try to replicate our though processes, the AI probably won't be perfect.

Old AI- used in R&C deadlocked

In Ratchet and Clank Deadlocked, the last Insomniac game on the PS2, had A.I. reminiscent of the PS2 era. First off all their paths were hand made, and used way volume paths. Simply referring to the picture above, it meant traveling from point A to B using these paths and volumes. Finally this was all navigated using A-star, a common algorithm for AI used even today.

Nav Meshing

A Nav Mesh is simply a mesh which what the AI will use to navigate the level. The mesh will be what the AI looks at when try to get from one point to another. The mesh is either hand created by designers, or created from a special tool. Also the designer can use this to predetermine where the AI can navigate to and where it can’t. The good part about this, is that the mesh can be having fewer triangles than the actual level, allowing for checking, and in the end faster path finding.


Resistance:Fall Of Man


When they moved to the PS3, Insomniac used navigation meshes to help with AI for their flagship PS3 game, Resistance: Fall of man. Their work began with a designer who would lay the nav-mesh out in Maya, after which tools would convert them into convex poly meshes for runtime. The polygons were treated as nodes in A* if they shared an edge. However despite the new method, they still ran into an issue, only 8 enemies could navigate the mesh at once. This was due to the “funneling of data”, also known as bottle necking on the PPU (Physics Processing Unit).

Resistance 2 changes 

There were many wanted Change with Resistance 2, however with AI there was 3 major changes. First was the bottle necking issue, which the team looked to PPUs and SPUs to fix. Second was the change of nav mesh, where they wanted to have meshes 9x times the size of the ones in RFOM. Finally there was the challenge of creating AI which would be appropriate for the 8 player coop.  The coop was a fun and frantic mode which I have spent many hours on because of the AI’s successfully implemented. 

Mesh changes 

With the development of Resistance 2 came a good amount of changes in nav meshes and their creation. There were different sizes Nav Meshes in the level now, to deal with the different sizes of enemies, which ranged from the dog sized leapers, to human sized hybrids, and the massive Titans. There were parameterizations for navigation of the mesh so enemies can jump up and down ledges. Polygon shapes created for the nav mesh were not acceptable anymore, so just good old triangles could be laid down. However meshes were clustered together, separated by colors, to allow for the creation of these polygon shapes.


A* or Hierarchical path finding

With the change in meshes, the team debated whether to use the A* algorithm, or a hierarchical path finding. Hierarchical path finding is an organized method which went through all the mesh, first at a high level and then at a lower level. Unfortunately this method had issues when creating a path, as the lower level path wasn’t always created. However at the same time, path caching was introduced, which allowed for efficient checks whether the path can successfully make it to its end point. This method allowed for A* to have a better computation time when finding a path. Also AI would generally just move from one end of room to another, so Hierarchical path finding wasn’t as useful. In the end A* was used, and Hierarchical path finding was scraped for Resistance 2.

Path Corners 

When turning around corners with AI, there is always an issue with the proper path and synchronization. This issue was especially prominent with the new zombie enemies, the Grims, since they ran fast! Fast as in 8 Meters per second, and the IG wanted to keep this speed, despite the problems in syncing the animation and orientation of Grims. To solve this issue, a Bezier curve was implemented to tune the path. The path helped the enemies properly find their way around corner with a nice curve.

Grims

As mentioned earlier Grims were on of the tricky enemies to create, because they would come in huge swarm. With Grims, there were times where up to 50 of them would run through a narrow corridor and about 100 of them in the coop. This would be dangerous to performance since each grim had to see every other grim as an obstacle, while checking for the local environment obstacles.
The team came up with a special method of doing this, called the “Grim cache”. The spark of this idea was that all the Grims shared the same threshold tolerance they had to maintain from the boundaries. The cache would allow every Grim obstacle would look around the boundary edges and cache the closest distance to the boundary for each one. This was similar to their obstacle avoidance method which was used for other AI. In the end seeing dozens of Grims swarming you from every direction became of my highlights of playing Resistance 2.

 In fact because of this I was so impressed with the Grims, the Grim skin became my most favourite Chimera skin to use in competitive multiplayer. :P 

Eliminating the Bottle neck: Using the SPU and PPU

To fix the bottle neck, they moved the processing of the nav-meshes to the PS3’s SPU (Special processing Unit).  To push all the processing on to the SPU, Insomniac batched all the nav queries and ran it full-frame deferred on the PS3’s PPU. All data access was isolated to be pushed to the SPU. A nav SPU job had to be created, which included finding a point on a mesh query, with some restrictions and finding a path between the start and the destination. This is in addition to computing the obstacle processing data for steering behavior.
The SPU processing was split into 3 passes: accumulation, finding nearest boundaries, and flagging tangents. The first accumulated all obstacles in all paths, and the second gathered the nearest boundaries for obstacles. The last pass ran through all the paths, once more looking at all the obstacles and their boundary edge threshold tolerance. This was computed in the previous pass, and it would be used to effectively flag the tangents appropriately. This tangent is used for AI to properly make a path around a corner, and other situations.

Conclusion 

In the end, with all the extreme changes in the AI help Insomniac game achieve their ambitious goal of making Resistance 2. With only a year of full development I was very surprised to see overall quality of the game come out. Despite the overall lack of quality, the MASSIVE scope more than made up for it. In fact Resistance 2 stands as one of my most favourite shooters for being respectable in compromising quality for a scope unseen in most games.  Hopefully this analysis of all their processes put into the AI will inspire someone (or me) to make a game of similar scope one day :D.

Saturday, 16 November 2013

MIGS 2013:Umbra 3- How It works


This was from a presentation by Antti Hätälä, from Umbra Software, at MIGS (Montreal International Game Summit) 2013.

Intro

What do many next gen games have in common? Is the improvements over graphics, such as better shaders, higher textures and more polygons being pushed? Well yes, but almost all the next gen games use a powerful software called Umbra 3.

What is Umbra3

Umbra in some languages means shadow, a name similar to its purpose: occlusion culling. Occlusion culling is simply not rendering objects which the player does not see.  
Umbra3 is a middleware for 3D games, which specifically does this. Its true purpose is “powering up” level creation/ rendering saving game developers precious time and resources.

Why use occlusion culling

Using occlusion culling will save on A LOT  of memory, memory which you can use for many things. You can use this memory to stream better detail in the world, such as textures and models. Physics, and AI can have more leeway, allow for more enemies/objects. Most importantly is improved game performance, not just for the higher end PCs, but also for the lower end PCs and consoles.


Ways of doing Occlusion Culling Today(Pros and Cons) 


1- Use a set amount of geometry to act as a mask occluding the view of the player. This mask is easy for the developers to specify, and provides flexibility. However this can be easily desynchronized from the player’s view, and will result in many artifacts. A case of this would be when the user spins the camera too fast, the occlusion isn’t done fast enough, and/or creates artifacts.
2- Use of algorithms based on what is seen from the user’s perspective to determine what shouldn’t be draw. This doesn’t really on any 3D assets, and all on the code of the programmer. The major issue with this is that is non-automatic and is relies heavily on the CPU.
3- Use the portals and cells method, which involves pre-setting a bunch of rooms aka cells, and window aka portals. Nothing outside cell the user is in will be rendered, but only if the user looks through a portal. The issue with this one is fact this is only good for indoor environments, and cannot be applied to a large field. Also this involves the time consuming process of placing Cells and Portals throughout the finished level.
4- Finally there is the PVS method- (potiental visiblitly set). Basically it involves creating separate software to precompute what objects will be visible from any spot. Once the software is done, it is automatic, and generally artifact free. However the major issue is when you put in a large world, the PVS could take days-weeks to render. In short despite its flexibility in type of level, this method will limit the scale of the level.

How Umbra 3 does it 


Using Umbra, was explained to be a 2 step process 

First is the local step of precomputing a visibility map

This is a map of the whole level, which is done ONLY for non-dynamic objects. This map would be generated offline from separate software, and would be fed into the game prior to running it. The reason why this works well is the fact the map, no matter the size, is turned into voxels. This eliminates the issue of having high poly maps, and even large scale ones, while maintaining a good quality.
From here the software constructs the map, using portals and cells, using the following method. 
1- group together empty voxels 
2- Collect all the voxels within cells 
3-Gerate portals between cells   
4- remove portals not contributing to the occlusion 
5- extract the view location. 
After this you have a nice map which will give you the Tome of the Level.


Second there is run methods

There are many methods which the software uses at run to improve exsisting methods of Occlusion culling. Breath first traversal is done of the portals rather than recursive, so we don’t waste memory. The occlusion resolution isn’t rasterized, rather portals are rasterized. With this there is a 1-bit visibily maintained per cell when looking through any portal. The rasterized a depth buffer is used to determine the details of any object found in this buffer. This way objects can properly increase and lower in detail with their distance, if wanted from the game developer. Finally because the world is split into cells, you can stream in these blocks that are required for visibility queries.


Conclusion

In the end Umbra will reduce run time memory, allowing other processes to be done for the game. These processes can allow for greater emersion in the or even better performance. With this, artist can now put in more levels of detail within the level, while level designers have greater freedom with tool to create better levels. the target frame rates while enabling a new level of artistic freedom and rapid content iteration times for these projects

Tuesday, 29 October 2013

Data Structures- Queues,Stacks,Voxels


As its name suggests data structures are different ways which we organize data for our game.  There are many ways data structures which we can use in our game, ranging from the simple stack, to the more advanced voxel. For every Data structure, they each have strength and weakness, giving them situations which they are each suited for. This is part 2 of my Data structure blog, for part 1 click here

Queue

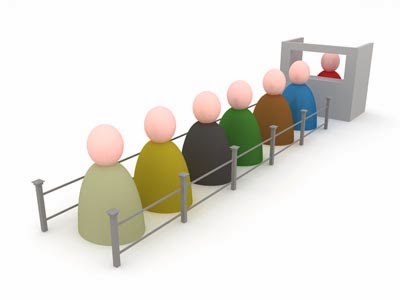
Quite simply- First in, first out This works just like a real life queue, where the person who enters first will get served first.
Uses for my game- Updating objects (positions, animations, physics). We use the priority queue to give to processes, such as animation, or specific objects, such as the player, first priority. If wanted the AI to be more advance, I can request it to queue up a bunch of commands to execute.

Stack

Quite simply- First in, last out. When dealing with stacks, imagine making and eating a stack of pancakes. The first pancake you make will go to the bottom, and when start eating, you’ll start from the top of the stack.
            Uses for my Game- In game stacks have many uses, from editors, to path finding, and finally for matrix multiplication. If we had a level editor, we could use stacks here to undo and redo recent changes which the user just did. If I used A* for my path finding, stacks can work for representing the neighboring nodes, rather than a graph. Finally if I were to use matrix multiplication, I would have to use stacks to make sure the multiplication is done in the right order. This would be done if I wanted to do something, like convert from model view, to what is actually being seen, for many reasons.

Voxels

These are an interesting data structure, and have many uses but they aren’t a new subject to me. My interest about it lead me to write a blog about Voxels and their use in Command and Conquer: Tiberian Sun, which you can visit here.  
If you don’t want to go there, a voxel is basically a shorted name for Volumetric Element. It is a setup from its 2D counterpart, the Pixel :Picture Element,and contains data in a 3d space. It can contain any form of data throughout it, from a simple Boolean value; to a RGB value. This way you can represent a 3D model, with an actual volume for each of its sides.
This makes it a great way for solving many 3D related real life problems. One problem is if we wanted to print a virtual 3D object in real life, we could turn it into a voxel. 3D printers like voxels because they go through the object, level by level, starting at the bottom. Another would be for the field of medicine, as they are great for CT scans. In CT scans, values stored in voxels are based on the opacity of material to X-rays. Since voxels can contain multiple scalar values ; in ultrasound scans with density and volumetric flow data are captured as separate channels of data relating each voxel in the data structure. With this doctors can visualize scans of the patient’s organs in 3d and help identify any anomalies within.  

In games voxels play major role, though none could probably be implemented in my game. The CryEngine 2 and 3, uses a combination of height maps and voxels to generate its terrain. This is because height maps cannot represent the interiors of caves or a concave object, so voxels must be used. With the popularity of minecraft, and resurgence retro styled games there have been many recent games which have had a voxel like world.  3D Dot Game Hero, Castle Story, Block Ops, and Cube are just a few of these games. Finally, the Unreal engine 4 uses real-time global illumination with full secondary lighting and specular reflections with voxel ray casting.
           

As you can deduce, the major problem with voxels will be their size in memory, due to their bulkiness. With a simple voxel cube of 128, each holding 4 byte of data(which is just small number value) , the voxel will be 8 million bytes! With this you can reduce it by storing only smaller memory values, such as Booleans. However there have recent advancements in voxels which have compressed the size of each voxel.